Rootkits:
What they are, and how to find them
Rootkits:
What they are, and how to find them
Creator: Xeno Kovah @XenoKovah
License: Creative Commons: Attribution, Share-Alike
(http://creativecommons.org/licenses/by-sa/3.0/)
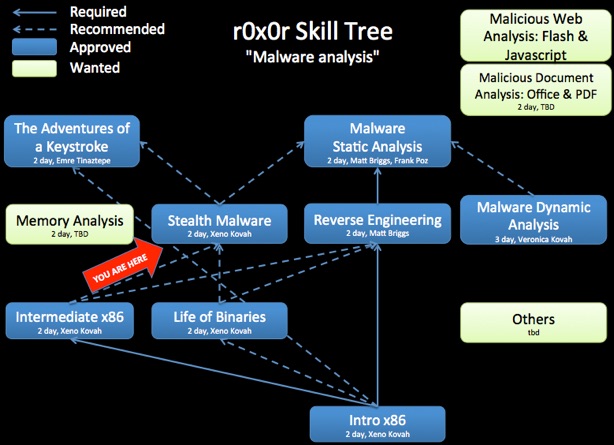
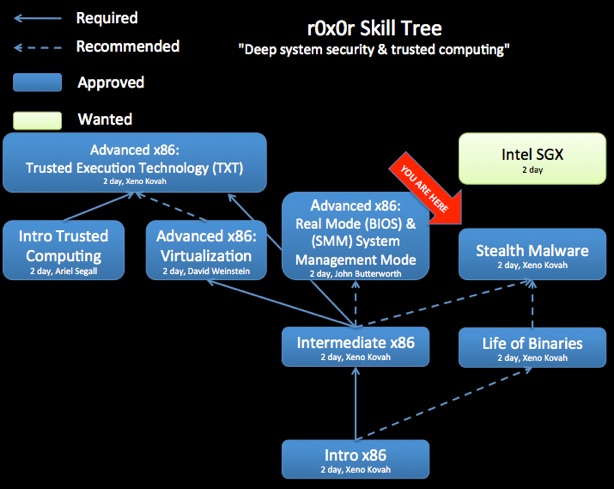
Class Prerequisites: You are recommended, but not required, to have taken Introduction to x86, Intermediate x86, and Life of Binaries.
Lab Requirements: Requires a Windows XP virtual machine. Rootkits are installed into the machine per the instructions in the TiddlyWiki class materials.
Class Textbook: “The Rootkits Arsenal” by Bill Blunden. (All page references in the class material are currently for the 1st edition book, the 2nd edition is not recommended.) This book was chosen because it contains the broadest coverage of rootkit topics. “Rootkits: Subverting the Windows Kernel” is good as well, but getting a bit dated. Recommended, but not required, is Windows Internals 6th edition, Part 1 and Part 2. This provides a large amount of detail on Windows’ internals, of which rootkit-relevant components are a small part. But the books can provide additional information that people interested in deep system security may be interested in.
Recommended Class Duration: 2 days
Creator Available to Teach In-Person Classes: Yes
Author Comments:
Introductory Intel x86, Intermediate Intel x86, and Life of Binaries are strongly recommended to be taken before of this class.
Rootkits are a class of malware which are dedicated to hiding the attacker’s presence on a compromised system. This class will focus on understanding how rootkits work, and what tools can be used to help find them.
This will be a very hands-on class where we talk about specific techniques which rootkits use, and then do labs where we show how a proof of concept rootkit is able to hide things from a defender. Example techniques include
•Trojaned binaries
•Inline hooks
•Import Address Table (IAT) hooking
•System Call Table/System Service Descriptor Table (SSDT) hooking
•Interrupt Descriptor Table (IDT) hooking
•Direct Kernel Object Manipulation (DKOM)
•Kernel Object Hooking (KOH)
•IO Request Packet (IRP) filtering
•Hiding files/processes/open ports
•Compromising the Master Boot Record (MBR) to install a “bootkit”
The class will help the student learn which tools to use to look for rootkits on Windows systems, how to evaluate the breadth of a tool’s detection capabilities, and how to interpret tool results.
This class is structured so that students are given a homework to detect rootkits *before* they have taken the class. This homework is given in the context of the following scenario:
“You, being the only ‘security person’ in the area, have been called in to
examine a running Windows server because "it's acting funny." They don't
care that you like Mac/Linux/BSD/Plan9 better, you need to look at it! You
are solemnly informed that this is system is mission critical and can only
be rebooted if absolutely necessary. You must investigate whether any sort
of compromise has taken place on the system, with minimal impact to the
mission. What do you do? What DO you DO?”
The homework is then for the student to use any means at their disposal to write up answers to the following questions: “What malicious changes were made to the system?”, “What tools did you use to detect the changes?”, “How can you remove the changes?”. The students’ answers are then anonymized and shared with the rest of the class afterwards, so that they can see how others approached the problem, and learn from their techniques. The anonymization of the homework before distribution is important so that students know that even though they don’t know, and aren’t expected to know, anything about the area yet, their entry will not be judged by other students.
A student Q&A forum has been set up at http://www.reddit.com/r/OST_Rootkits.
To submit any suggestions, corrections, or explanations of things I didn’t know the reasons for, please email me at the address listed above.
Author Biography: Xeno co-founded LegbaCore in January 2015 to focus on improving firmware security. He is also the founder and lead contributor to OpenSecurityTraining.info. He has posted 9 full days of class material material on x86 assembly, architecture, binary formats (PE and ELF), and Windows rootkits. He has a Bachelors of Science in Computer Science from the University of Minnesota Twin Cities, and an Masters of Science in Information Security Technology and Management from Carnegie Mellon University. He attended CMU through the National Science Foundation Scholarship for Service (aka CyberCorps) program. His specialty area is stealth malware and its ability to hide from security software and force security software to lie. To combat such attacks he researches trusted computing systems that can provide much stronger security guarantees than normal COTS. He has presented at BlackHat USA/EUR, IEEE S&P, ACM CCS, Defcon, CanSecWest, PacSec, Hack in the Box KUL/AMS, Microsoft BlueHat, Shmoocon, Hack.lu, NoSuchCon, SummerCon, ToorCon, DeepSec, VirusBulletin, MIRCon, AusCERT, Trusted Infrastructure Workshop, NIST NICE Workshop, DOD Information Assurance Symposium, and MTEM.

Class Materials


WARNING! password = “infected” because AV *will* flag on some of these files.
(Collection of Rootkit detectors. Some used in class some not. Most likely out of date by the time of download) - Password = “notinfected”, but my AV doesn’t like flister, so yours might not either.


Day 1 Part 1 (52:37, 597 MB)
Day 1 Part 2 (1:11:23, 739 MB)
Day 1 Part 3 (58:56, 830 MB)
Day 1 Part 4 (1:04:34, 675 MB)
Day 1 Part 5 (57:56, 697 MB)
Day 1 Part 6 (1:00:29, 750 MB)
Day 2 Part 1 (53:17, 731 MB)
Day 2 Part 2 (1:00:29, 693 MB)
Day 2 Part 3 (1:03:57, 946 MB)
Day 2 Part 4 (50:19, 511 MB)
Day 2 Part 5 (1:02:54, 695 MB)
(10:56:51 total, sans lab time)
The videos are useful for students, but also more useful for potential instructors who would like to teach this material. By watching the video, you will better understand the intent of some slides which do not stand on their own. You are recommended to watch the largest size video so that the most possible text is visible without having to follow along in the slides.

Revision History:
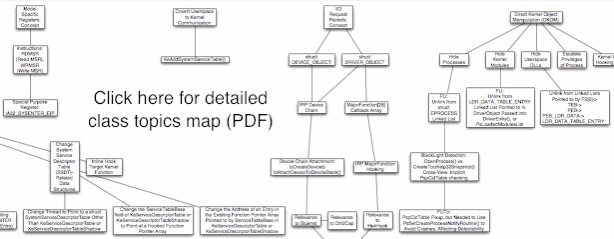
03-17-2013 - Made fine-grain class map more prominent
04-14-2012 - Uploaded videos to Youtube
01-15-2012 - Added “undetectable” keylogger lab creation steps to TiddlyWiki
09-21-2011 - Videos uploaded
06-31-2011 - in-class revisions
05-19-2011 - Initial class content upload
If you have used and modified this material, we would appreciate it if you submit your modified version for publishing here, so that all versions can benefit from your changes.